3.1.3 Outlook® 2007 and Outlook® 2010
Open your Outlook.
In the menu bar in your Outlook 2007 choose the entry "File/Data File Management"
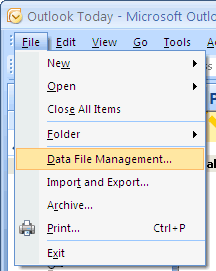
In Outlook 2010 please choose the entry "File/Info/Account Settings...".
The following dialog window will appear:
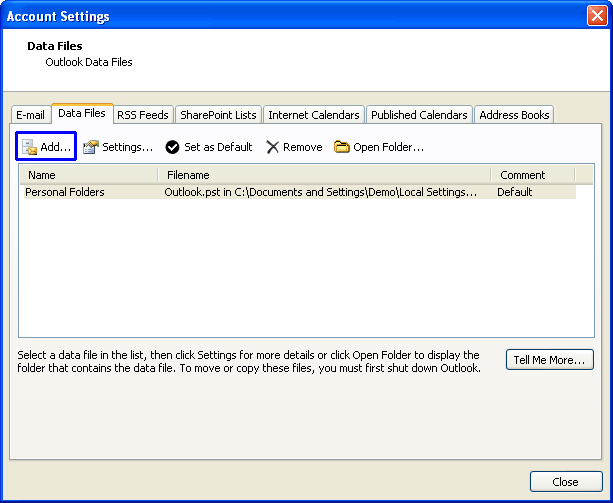
Click on "Add", and the following dialog window will open:
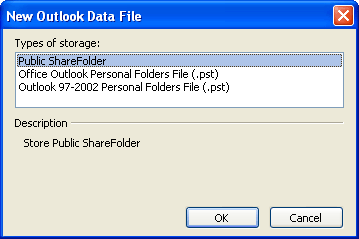
Please add "Public ShareFolder" and the following dialog window will appear:
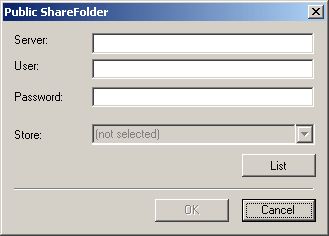
Insert the name of the PC / server where "Public ShareFolder" was installed as well as the name of the user.
We told you the name in this manual on the site "Name of the server"
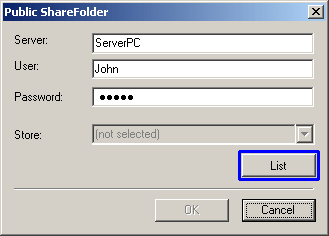
Before you click on "List" you must be sure that the "Public ShareFolder Server" is in fact "On", the data file (PST) is not "by chance" blocked, it guarantees the right user entry with the right password.
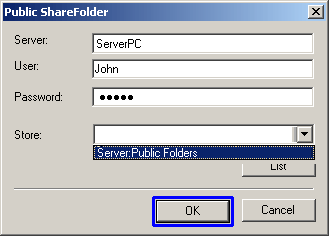
If you now click on "List" the available data files which you can access will appear.
================================================================
If you would get a "White" or "blanc" field, have a look on our FAQ No. 44
If you get an error number, please have a look to our FAQ website or please write us an email with the error message and (important) the Windows version of your client and server, Outlook version and installed firewalls and virus protection software to: support@publicshareware.com
================================================================
Confirm your choice with "OK"
The following dialog box will appear:
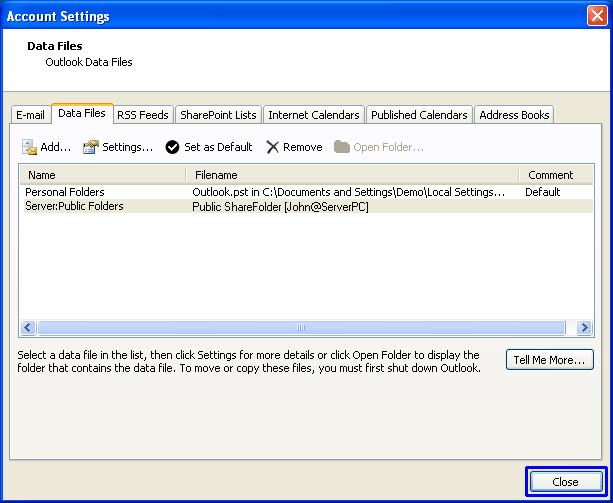
Confirm this field with "Close".
Now the moment of truth has come: An extra folder is now shown in your Outlook (provided you have also activated the Folder List in Outlook):
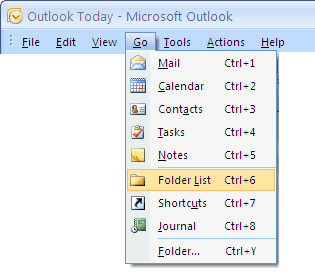
The following additional list of folders will now appear in your Outlook:
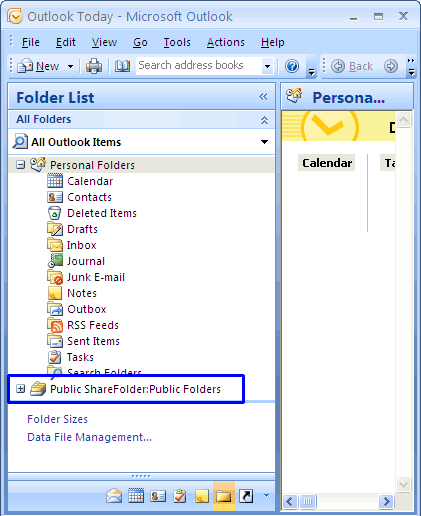
If you now click on the "+" symbol the folder will now come up as follows:
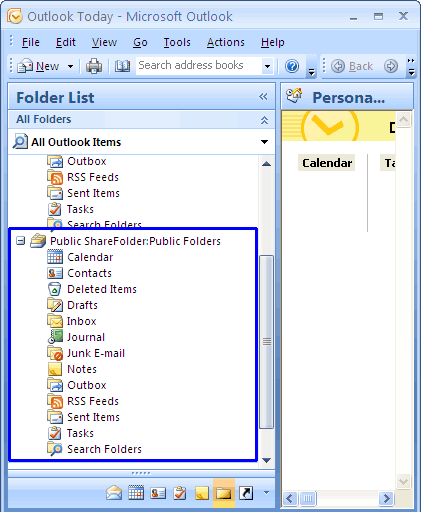
This folder is identical with the Outlook folder on the server PC. The items which you enter here are fully available to every other client that you install.


